Motivation
(You don’t need to read this: to get to the tutorial just scroll down a bit)
I work in R&D, in a small team, and the work I do crosses the boundary between hardware and firmware, as many Electronic Design Engineers experience. In the course of this work I’ve found myself tasked with a reasonably large FPGA project: the final goal of which is to run some custom programmable logic alongside an internal processor, with embedded linux as an OS. That’s the brief (in brief).
Okay, so there are 3 different things at work here: the programmable logic itself, the embedded linux OS, and the application firmware which will eventually run on that OS.
In order that work can be completed on all 3 of these sections simultaneously, and to avoid a workflow primarily focused around emailing each other zips of entire projects (yes, this happens), it was obvious that we needed source control. Oh, and throw into the mix that the team primarily uses Windows to do it’s development, and going in and out of VMs all the time – as most Petalinux projects seem to – is a frankly awful workflow.
So what’s the solution here?
Well… WSL, and Git, and some scripting, and lots of time, and lots of coffee.
Tutorial
Part 0 - Assumptions
Okay so if you’re following this tutorial I’m going to assume the following:
- You’re a competent user of computers and can navigate both windows and linux via the command line.
- You already have the Xilinx Vivado and Vitis software installed (in my case it’s the 2019.2 version and that is what these instructions will work for – no it doesn’t work on the 2020 distributions).
Part 1 - Petalinux and WSL
We’re using the Xilinx Zynq SoCs, and the obvious choice of embedded linux OS for these absolute *beasts* is Petalinux – what a shock, it’s in the title. But Petalinux is a temperamental child which will throw it’s toys out of the pram at the slightest inconvenience, and thus we need to make sure it’s happy. The prep begins:
Step 1: Install WSL as Ubuntu 16.04 LTS
Yes, it’s annoying that this has to be 16.04 LTS, especially if you already have WSL enabled.
No, there’s nothing you can do.
No, it doesn’t work on later versions of Ubuntu.
Yes, I’ve tried.
The instructions for installing WSL can be found here.
Follow the manual installation steps as far as choosing your linux distro, then make sure you choose 16.04 LTS.
Step 2: Configure your WSL
Fire up WSL and run the following commands -
Link your downloads folder (this will come in handy later):
sudo ln -s /mnt/c/Users/[user]/Downloads ~/WinDownloads
Link your Vivado workspace:
sudo ln -s /mnt/c/[wherever it is] ~/Vivado
Add 32-bit apps to apt-get
sudo dpkg --add-architecture i386
Update apt-get
sudo apt-get update
Install all the (many) dependencies:
sudo apt-get install -y gcc git make net-tools libncursesw5-dev tftpd zlib1g-dev libssl-dev flex bison libselinux1 gnupg wget diffstat chrpath socat xterm autoconf libtool tar unzip texinfo gcc-multilib build-essential libsdl1.2-dev libglib2.0-dev zlib1g:i386 screen pax gzip gawk glibc-doc:i386 locales:i386 ncurses-dev qemu-system-arm:i386 ncurses-dev:i386 libstdc++6:i386 libselinux1:i386 lib32ncurses5-dev
Step 3: Download Petalinux
On windows, go to the petalinux download page and download petalinux 2019.2.
Step 4: Copy it to WSL
In WSL, copy it from your windows downloads to it’s own folder:
cd ~

mkdir petalinux

cp WinDownloads/petalinux-v2019.2-final-installer.run petalinux
Step 5: Run it
In WSL, run the Petalinux installer and accept the EULA’s:
cd petalinux

./petalinux-v2019.2-final-installer.run
Step 6: Edit some language parameters because yes this is necessary
Change your language to be US English, if it wasn’t already:
sudo dpkg-reconfigure locales

sudo update-locale LANG=en_US.UTF-8
Step 7: Source the petalinux tools
You need to do this every time you boot WSL, or add it to your .bashrc
source ~/petalinux/settings.sh
Congratulations! You have the Petalinux tools installed on WSL… now to actually use them for something.

Part 2 – Creating and building a petalinux project
Assuming you’ve done everything right in part 1, and the Petalinux gods are with you, this part should go without a hitch. Right?
Step 1: Create a project directory
This isn’t actually necessary, but I like it because it keeps things clean:
cd ~/petalinux

mkdir projects
Step 2: Create the project
In our case this will be called “wsltest”, and as I’m using a zynq 7015 it will use the znq template, but you can use a bsp or another template here.
cd projects

petalinux-create –-type project –-name wsltest –-template zynq
This should create a directory in your projects directory called “wsltest” in which the project will reside.
Step 3: Perform the project config
In this step you need to hand your petalinux project a hardware description, which in my case I created from Vivado in that directory we linked earlier.
petalinux-config –-get-hw-description ~/Vivado/[project directory]
This should then give you a menuconfig like this:
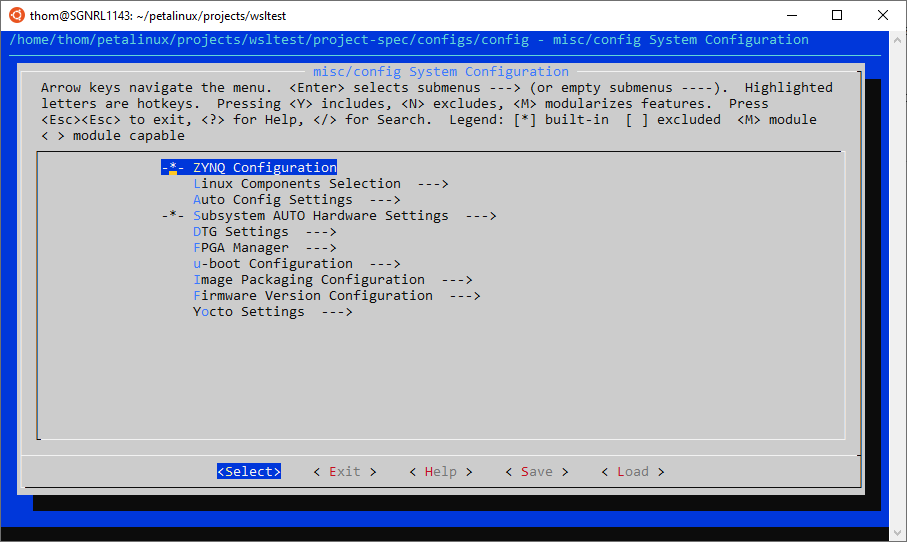
You don’t need to change any settings here, but I like to give my projects a static ip to make connecting to them with ssh easier down the line.
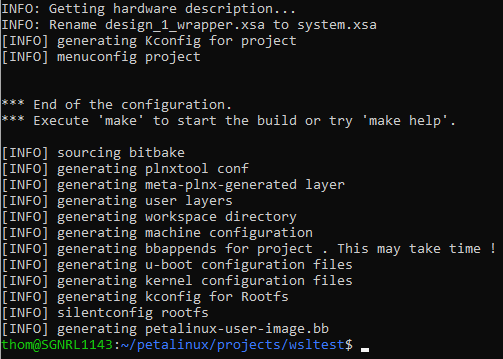
Exit this and it should look like this:
Step 4: Configure what’s actually on your linux build
It may seem odd to have to configure it again, straight away, but this is actually a different configuration menu, dedicated to the contents of your linux build.
petalinux-config -c rootfs
On this command you should see a screen very similar to the last, but with different options:
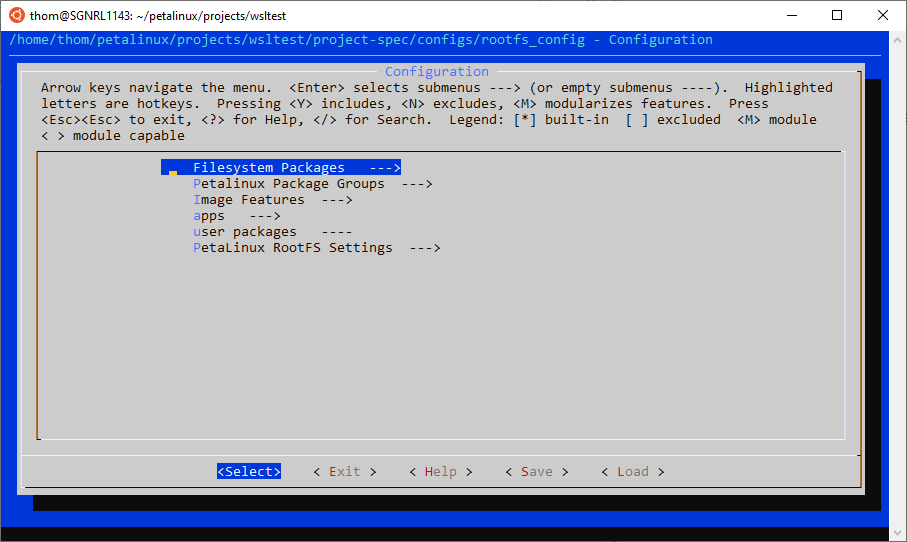
For this system I’m going to use dropbear, so go into:
Filesystem Packages -> console -> network -> dropbear
And enable the option by selecting and hitting ‘y’. I’m also going to enable Python:
Filesystem Packages -> devel -> Python
And in the apps I’m going to enable the gpio demo
Apps -> gpio demo
Save the config and exit.
Step 5: Build the project
Moment of truth…. Does it build.
petalinux-build
If all is well you should see something like this:

This will take a while, so be patient!
Once it’s done you should see a success message, don’t worry if you see messages about a tftp directory.
Step 6: Check it runs on qemu
Qemu is an emulator packaged with petalinux on which you can test your builds, to do this run the following:
petalinux-boot --qemu --kernel
If all is well you should see a bunch of text as the kernel boots, followed by (finally) a prompt to log in. This may take some time so don’t worry too much if it does!
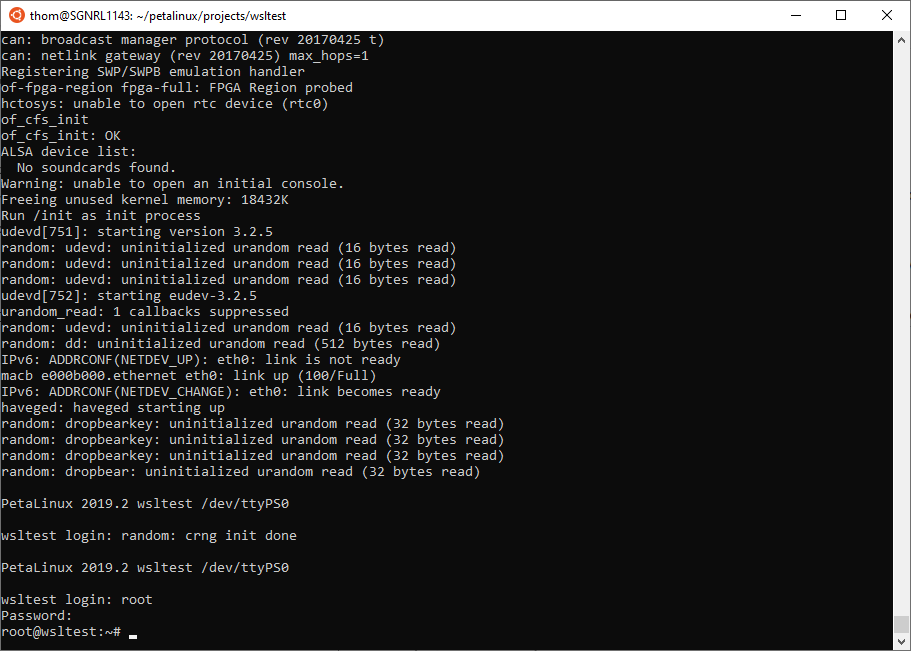
The username and password should both be “root”.
To test this we are going to initialise python and run a simple command:
root@wsltest:~# python

>>> print “Hello world!”
You should see the following:

To exit qemu press ctrl-A followed by X.
Congratulations, you’ve built linux!
Part 3 - Gitting involved
Okay, so up till this point, we’ve mostly been just following bog standard stuff but using Ubuntu on WSL rather than a VM. But we want to do use Vitis on Windows for our development? So how do we go about this?
What we’re going to do is take this linux build, export the toolchain, and build a Vitis project around it such that we can build applications to run on it. To make this a nicer workflow, we’re going to make both the petalinux project and the application project git repositories, with the petalinux build sitting as a submodule of the application build (if you don’t know what submodules are - have a read here).
I’m going to be using bitbucket as my git host, but you can use github if you so wish.
Step 1: Build the project again, this time for an sdk.
petalinux-build --sdk
This will build and package up all of the relevant files needed to build applications which can run on our petalinux OS. Note: this takes a while…
Step 2: Package the sdk
petalinux-package --sysroot
This will package up the sdk into one convenient location such that we can transfer it to windows and get developing.
Step 3: Ironing out the OS issues
So we’ve now got an sdk ready and waiting inside our images/sdk directory, so just dump this all in VC and crack on right? Wrong. There are some frustrating habits that Petalinux can’t give up which make this impossible:
- The sdk is built with symbolic links to files, rather than the files themselves. When we put these on windows they will no longer work and our sdk will be broken.
- The sdk exists on linux, which is a case-sensitive OS, wheras we want to develop on Windows, which is not case sensitive. The sdk has lots of files with the same name, but different case, e.g. libxt_CONNMARK.so and libxt_connmark.so. To make this slightly more annoying the lower case files appear to be the one’s we want (via file inspection) wheras the upper case files seem to be placeholders.
Okay, so we need to make a copy of this sdk subdirectory with symbolic links replaced with actual files, and no duplicates. Where duplicates exist we need to pick the one with the lower case rather than the upper case. Oh and as a small gift from the petalinux gods we only need 2 of the folders from the overall sdk: usr and lib.
The solution is to use the .gitignore file, which will become relevant when we turn this project into a git repo. The plan of attack goes like this:
DO THESE ONCE:
- Create an sdk subdirectory in the project root
cd [proj root]

mkdir sdk
- Make a subfolder in that directory called sysroots
cd sdk

mkdir sysroots
- Make 2 subfolders in that directory: usr and lib
cd sysroots

mkdir usr

mkdir lib
Now, DO THIS EVERY TIME YOU REBUILD AND REPACKAGE PETALINUX:
- Make sure you’re in your project directory!
cd ~/petalinux/projects/[project name]
- Remove whatever may currently be in your sdk/usr and sdk/lib directories
sudo -S rm -rf sdk/sysroots/usr

sudo -S rm -rf sdk/sysroots/lib
- Copy the newly generated directories, replacing symbolic links with actual files
sudo cp -R -L images/linux/sdk/sysroots/[your cpu]/usr sdk/sysroots/

sudo cp -R -L images/linux/sdk/sysroots/[your cpu]/lib sdk/sysroots/
- Make a list of all of the duplicate files when sorting the contents of the sdk filder in reverse order (this will see the lowercase files first, thus the duplicates are the upper case files). For each of these duplicates remove the leading “.” character of the filepath and then append this list to the current contents of the gitignore file (which we will populate later).
find ./sdk/ | sort -f | tac | uniq -di | cut -c2- >> .gitignore
- If you’re running this for the 2nd or 3rd time some of these items you’ve just appended to your gitignore may already be there, so let’s tidy this up. Remove the duplicate lines and save that in a new file called .temp.
sort .gitignore | uniq > .temp
- Now replace the gitignore file with the temp file (we do this in 2 stages because you can’t write to a file you have open for reading - or at least this was easier than finding out how you do that).
rm .gitignore

mv .temp .gitignore
To make all of this easier in future, I made a script which you can download and sit in your project root, which you can simply run every time.
Make sure you change “cortexa9t2hf-neon-xilinx-linux-gnueabi” for your cpu build.
Step 4: Copy the wrapper to the sdk directory
You’ll need the design wrapper for the project generation later down the line, so copy it to your sdk directory now:
cp ~/Vivado/[your wrapper].xsa sdk
Step 5: Actually create yourself a real gitignore
Okay so if you did all of the above successfully you should have a .gitignore file in your root directory full of duplicate files, and the following content:
build/
/components/plnx_workspace
*/*/config.old
/images/linux/sdk
/images/linux/sdk.sh
*.jou
*.log
*.o
.petalinux/*
!.petalinux/metadata
pre-built/linux/
project-spec/meta-plnx-generated/
*/*/rootfs_config.old
Edit this to remove *.o and allow us to check in the object files necessary for building, you may need to change the file permissions with the following command:
sudo chmod a+w .gitignore
You should also edit the images/linux line to:
/images/linux/sdk/
Your .gitignore should look like this:
build/
/components/plnx_workspace
*/*/config.old
images/linux/sdk/
*.jou
*.log
.petalinux/*
!.petalinux/metadata
pre-built/linux/
project-spec/meta-plnx-generated/
*/*/rootfs_config.old
/sdk/sysroots/usr/include/linux/netfilter_ipv4/ipt_ECN.h
/sdk/sysroots/usr/include/linux/netfilter_ipv4/ipt_TTL.h
/sdk/sysroots/usr/include/linux/netfilter_ipv6/ip6t_HL.h
/sdk/sysroots/usr/include/linux/netfilter/xt_CONNMARK.h
/sdk/sysroots/usr/include/linux/netfilter/xt_DSCP.h
/sdk/sysroots/usr/include/linux/netfilter/xt_MARK.h
/sdk/sysroots/usr/include/linux/netfilter/xt_RATEEST.h
/sdk/sysroots/usr/include/linux/netfilter/xt_TCPMSS.h
/sdk/sysroots/usr/lib/xtab…
Step 6: Make the git repo
We’re finally in a position where we’re ready to go! Make the git repo with the following command in the project root directory:
git init
Followed by the following:
git add .gitignore

git commit -m “Added gitignore to start”

sudo git add -A

sudo git commit -m “Added the project source files”
Then hook it up to whatever remote takes your fancy and push it! Voila, the project is now in git.
Part 4 - Setting up the windows project
So now we have the ability to pull ourselves a fully formed sdk on which to develop, it’s time to make the project. There are 2 things to do here:
- Make a “Platform project” based on our sdk, in Vitis.
- Make an “Application project” based on our platform project, which will be the actual application.
Because of the way Vitis is organised, both these things need to happen! However, we only really want our application source files to be under VC, everything else is just eclipse based fluff? So we’re going to aim for the following:
- Application source files in a VC’d location
- The sdk as a submodule in this location
- A script that anyone can use to build the platform project and the application project from the source files and the sdk in whatever location they have their git repo’s stored.
The advantages of this is that the project is not always checking in and out huge quantities of files, and the files under VC have NO BEARING on an individual computers setup.
On windows I like to use sourcetree to manage my git repos, but you can use whichever VC gui you like.
Step 1: Create a git repo and clone it to your windows machine
I’m not going to tell you how to do this, I’m sure you already know if you’re reading this article.
Step 2: Add your petalinux repo as a submodule
Again, this is tool specific, so go ahead and add it however you see fit.
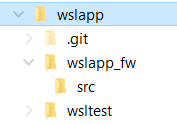
Step 3: Create a folder with your application firmware name, and a folder inside that called src
It should look like the image below:
Step 4: Add some basic “hello world” code to your src folder
Something like this will do:
#include <stdio.h>

int main()
{
      printf("Hello World!");
}
Save this as “helloworld.c” inside the src folder. This is a placeholder to show you how generating a project around sources that already exist works.
Step 5: Create a launch script, and a batch file to launch the launch script…
To do this, we’re going to use something called XCST, which is a command line interface to the Xilinx tools. We can execute XCST commands via a .tcl script.
The tasks we need to complete with this script are as follows:
- Set the Vitis workspace to the directory we’re in
- Create the platform project with the correct settings
- Add in the sysroot path and path to the boot images
- Generate the platform project
- Create the application project with the correct settings
- Configure the application project to include the generated sysroot files
- Configure some compiler lags
- Configure the linker with the sysroot path
All of which I’ve conveniently packed in the following script for you:
puts "[*] Configuring git repo begin"

set wsdir [exec pwd]

setws {.}

puts "[*] Setting workspace successful"

puts "[*] Creating platform"

platform create -name "[your platform name]" -hw $wsdir\\[your submodule]\\sdk\\[your design wrapper].xsa -proc {[your processor]} -os {linux} -no-boot-bsp -out .

puts "[*] Platform created successfully"

platform write

platform active [your platform name]

domain config -sysroot $wsdir\\[your submodule]\\sdk\\sysroots

domain config -bif output.bif

domain config -boot $wsdir\\[your submodule]\\images\\linux

domain config -image $wsdir\\[your submodule]\\images\\linux

puts "[*] Platform configured"

platform write

puts "[*] Generating..."

platform generate

platform -make-local

puts "[*] Platform generated successfully"

puts "[*] Creating app project"

app create -name [your app name] -platform [your platform name] -domain linux_domain -os linux -template {Linux Empty Application}

puts "[*] Configuring..."

app config -name [your app name] -set compiler-misc {-c -fmessage-length=0 -MT"$@"}

app config -name [your app name] -add include-path $wsdir\\[your submodule]\\sdk\\sysroots\\usr\\include

app config -name [your app name] -add library-search-path $wsdir\\[your submodule]\\sdk\\sysroots\\usr\\lib

app config -name [your app name] -add library-search-path $wsdir\\[your submodule]\\sdk\\sysroots\\lib

app config -name [your app name] -add linker-misc --sysroot=$wsdir\\[your submodule]\\sdk\\sysroots

puts "[*] Application configured"

puts "[*] Complete! Thankyou for flying with ThomCousGit, we hope to see you again soon."

puts "Press Enter to quit."

gets stdin
Place this inside the project repository, and name it “generate_project.tcl”.
Alongside this, make a batch file (whatever name you like) which contains the following line:
C:\Path\To\Your\Xilinx\Vitis\2019.2\bin\xsct.bat generate_project.tcl
This will allow us to execute the tcl script to build our project.
Click here to download the script and the batch file.
Step 6: Create the bif file
You’ll notice that the tcl script references a .bif file, which we have yet to create.
The bif file lays out the various components of the boot image and where they’re placed, more info on this can be found here.
Create a file of the required format and populate it with information from your project, for reference, here’s mine:
//arch = zynq; split = false; format = BIN

the_ROM_image:

{

      [bootloader].\z7015plnx\images\linux\zynq_fsbl.elf

      .\z7015plnx\images\linux\u-boot.elf

      [destination_device=pl].\z7015plnx\images\linux\system.bit

      .\z7015plnx\images\linux\image.ub

}
Once this is done, you should be ready to generate your project.
Click here to download an example bif file.
Step 7: Generate the project
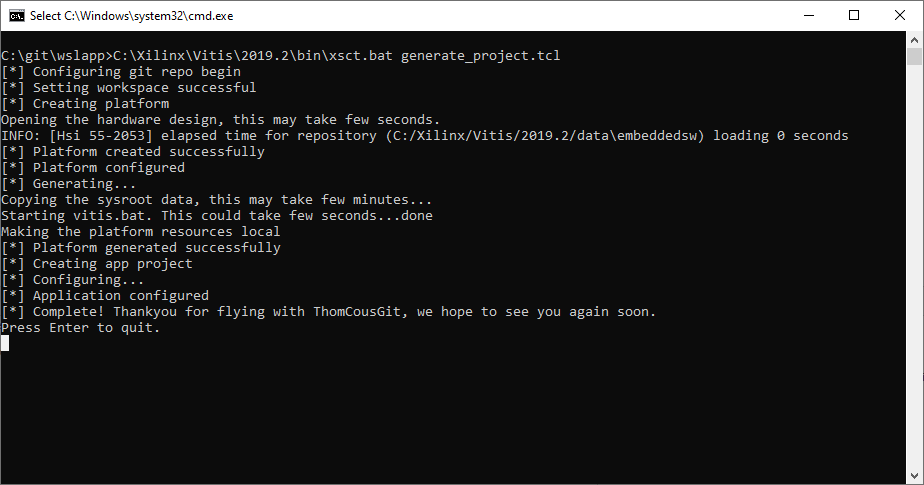
Run the launch.bat file, and check that the tcl script executes successfully. If it doesn’t check the file paths are correct.
Note, you may experience warning messages about files failing to copy, if so, it’s because the file path to those files is too long. The boost::filesystem::copy_file method which Vitis uses to copy these files has a 240 character limit on file names which can easily get overrun if the project is too deep into your file system.
When the process is complete, you should see something like this:
Step 8: Open the vitis project
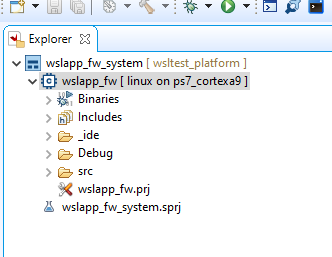
You can now open your project in vitis. Start vitis and when prompted to select a workspace, navigate to your repository and select there. A workspace should be set up in that directory waiting for you, with your firmware project located in that workspace.
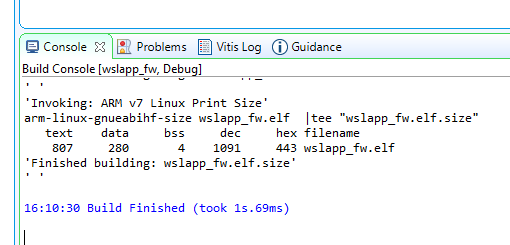
Navigate to that project and click build, it should build successfully!

I tried with 2019.1 (for existing project compatibility) and failed at:
[INFO] sourcing bitbake
[INFO] generating plnxtool conf
[INFO] generating meta-plnx-generated layer
[INFO] generating user layers
[INFO] generating bbappends for project . This may take time !
[INFO] generating u-boot configuration files
ERROR: Failed to generate u-boot configuration files
ERROR: Failed to config project.
ERROR: Get hw description Failed!.
Can you comment on that?
There are many issues which result in a “get hw description failed” message, it could be an incompatibility between your Ubuntu version and your Petalinux install, a dependency issue, or it could be as simple as a file path error.
Hello, Thanks for this skilled work.
I want to ask you if I can use it with Petalinux 2019.1.
Thanks.
You can certainly try! Though as I remark in the article “petalinux is a temperamental child which will throw it’s toys out of the pram at the slightest inconvenience” so I can’t tell you with certainty it will work.